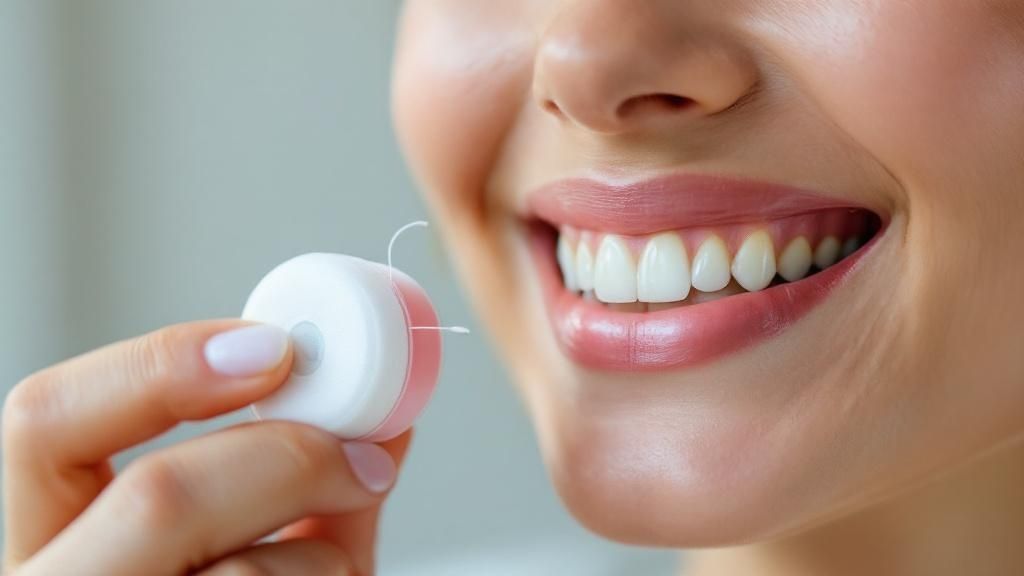
When you think about flossing, you might picture just snapping a piece of string between your teeth. But there’s a real art to it, and we’re here to guide you. The secret is using a “C-shape” to gently hug each tooth and clean just under the gumline. This is where plaque loves to hide, and it’s an area your toothbrush just can’t get to.
Mastering this simple motion turns a daily chore into one of the most powerful things you can do for your smile. It’s a small habit that helps prevent cavities and gum disease, and our team at City Dentists is here to help you feel confident every step of the way.
Why Proper Flossing Is a Game Changer for Your Smile
Most of us here in Wellington are pretty good at brushing twice a day, but it’s easy to overlook the critical spaces between our teeth. Your toothbrush does a fantastic job on the surfaces you can see, but that only accounts for about 60% of your tooth enamel.
So what about the other 40%? That’s prime real estate for plaque—a sticky film of bacteria—to set up camp. In our Wellington practice, we see every day how this buildup is the main culprit behind many common dental issues that are so easily preventable with the right habits.
What Happens When You Don’t Floss
When you skip flossing, you’re essentially rolling out the welcome mat for plaque to thrive in those tight spaces. This can directly lead to a few problems our team helps patients with all the time:
- Gingivitis: This is the first stage of gum disease. You might notice your gums looking red, swollen, or bleeding when you brush. It’s your body’s way of saying something isn’t right.
- Cavities: Bacteria feast on the tiny food particles trapped between your teeth, producing acid that eats away at your enamel.
- Bad Breath: Those same trapped food scraps and bacteria are a major source of persistent bad breath (halitosis).
This isn’t just a local issue; it’s a common story across New Zealand. Research from the University of Otago shows that while most Kiwis brush daily, only about 10% are flossing regularly. In the same study, over half of the people involved said their gums bled—a classic sign of gingivitis that good flossing can help fix. Another study echoed these findings, highlighting similarly low flossing rates and widespread gum bleeding during brushing. You can read the full study here.
At City Dentists, we don’t see flossing as just another task on your to-do list. We see it as one of the most effective tools you have for protecting your oral health. It’s a small daily action that pays huge dividends for your smile and overall wellbeing in the long run.
Finding the Right Flossing Tools for Your Teeth
Walking down the dental aisle in any Wellington supermarket can feel a bit overwhelming. With so many different flossing tools on the shelf, it’s easy to feel unsure about which one is right for your unique smile.
The good news? The best tool is simply the one you’ll use consistently and correctly. Our goal at City Dentists is to empower you with information, not overwhelm you. Let’s break down the common options to find your perfect match, making it easier to master your flossing technique and protect your oral health.
String Floss vs Dental Tape
Traditional string floss is what most people picture when they think of flossing. It’s fantastic for getting into those really tight spaces between teeth and comes in both waxed and unwaxed versions. Waxed floss tends to slide more easily, which is a big plus for many people, while some find unwaxed floss provides a better grip on plaque.
If you have slightly larger gaps between your teeth or find standard floss just too thin, dental tape is a brilliant alternative. Think of it as a broader, flatter ribbon of floss that covers more tooth surface with each pass. If you’re curious, we have a detailed guide that explores the differences between dental floss and dental tape.
Remember, the key to successful flossing isn’t the specific type of string you use, but the technique. It’s all about making that ‘C-shape’ curve around each tooth to clean below the gumline, right where plaque loves to hide.
Floss Picks and Interdental Brushes
For some people, wrapping floss around their fingers just feels awkward or clumsy. That’s perfectly fine! It’s exactly why other handy tools were invented.
- Floss Picks: These are small, disposable plastic tools with a short piece of floss held taut. They are incredibly convenient, especially when you’re on the go or need a quick clean after a meal. The main challenge, however, is effectively curving that short, tight piece of floss into the C-shape around each tooth. You also need to be careful not to simply move plaque from one gap to another.
- Interdental Brushes: Picture tiny bottle brushes designed for your teeth. These are absolute game-changers for cleaning larger gaps, especially around dental work like bridges. They come in various sizes to fit snugly into different spaces, offering a really thorough clean.
Which Flossing Tool Is Right for You?
To help you decide, here’s a quick comparison to help you select the best flossing aid based on your own dental needs and preferences.
| Tool Type | Best For | Pros | Cons |
|---|---|---|---|
| String Floss | Tight tooth contacts and general use. | Highly effective; widely available; affordable. | Can be tricky to handle; might snap in tight spaces. |
| Dental Tape | Wider gaps between teeth; sensitive gums. | Covers more surface area; less likely to shred. | May be too thick for very tight contacts. |
| Floss Picks | Convenience, travel, and those with dexterity issues. | Easy to hold and use; portable. | Difficult to create the ‘C-shape’; can spread bacteria. |
| Interdental Brushes | Large gaps, bridges, and implants. | Very effective for wide spaces; easy to manoeuvre. | Needs different sizes for different gaps; not for tight spaces. |
Ultimately, choosing the right tool is a personal decision based on your teeth, your dexterity, and your lifestyle. Don’t be afraid to experiment with a couple of options to find what feels most comfortable and effective for you. The most important thing is to just get started.
Mastering the Correct Flossing Technique
Now that you’ve got your floss, let’s get into the most important part: your technique. Learning how to floss properly is a skill, and just like any other, it gets easier and feels more natural with a little bit of practice. Here at our Wellington practice, our caring team guides patients through this every day, helping them turn a fiddly task into a simple, confident habit.
The goal isn’t just to quickly poke between your teeth. It’s about methodically removing the plaque your toothbrush simply can’t reach. We’re going to walk through the exact method our dentists teach at City Dentists, using standard string floss as our guide.
Preparing Your Floss
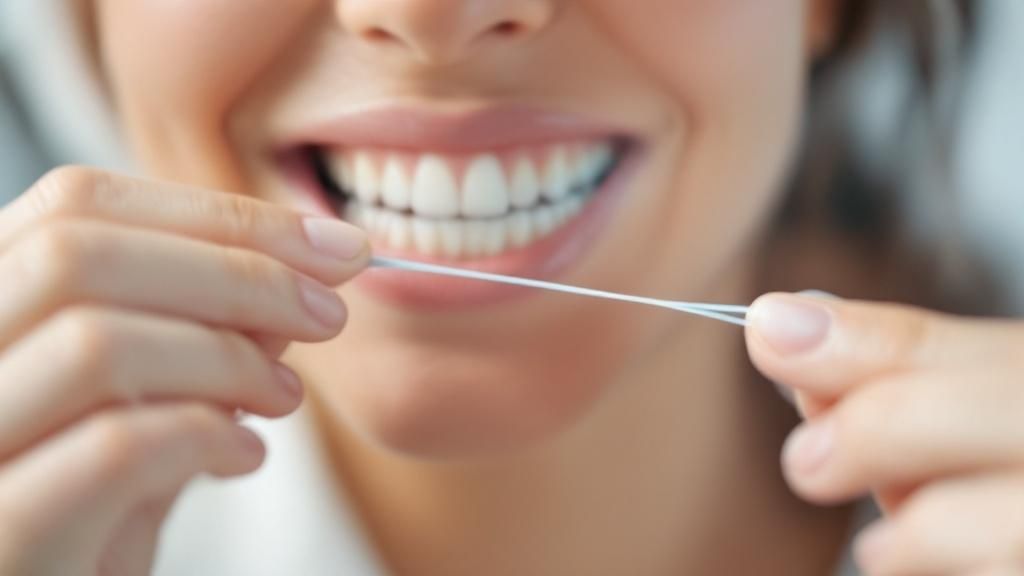
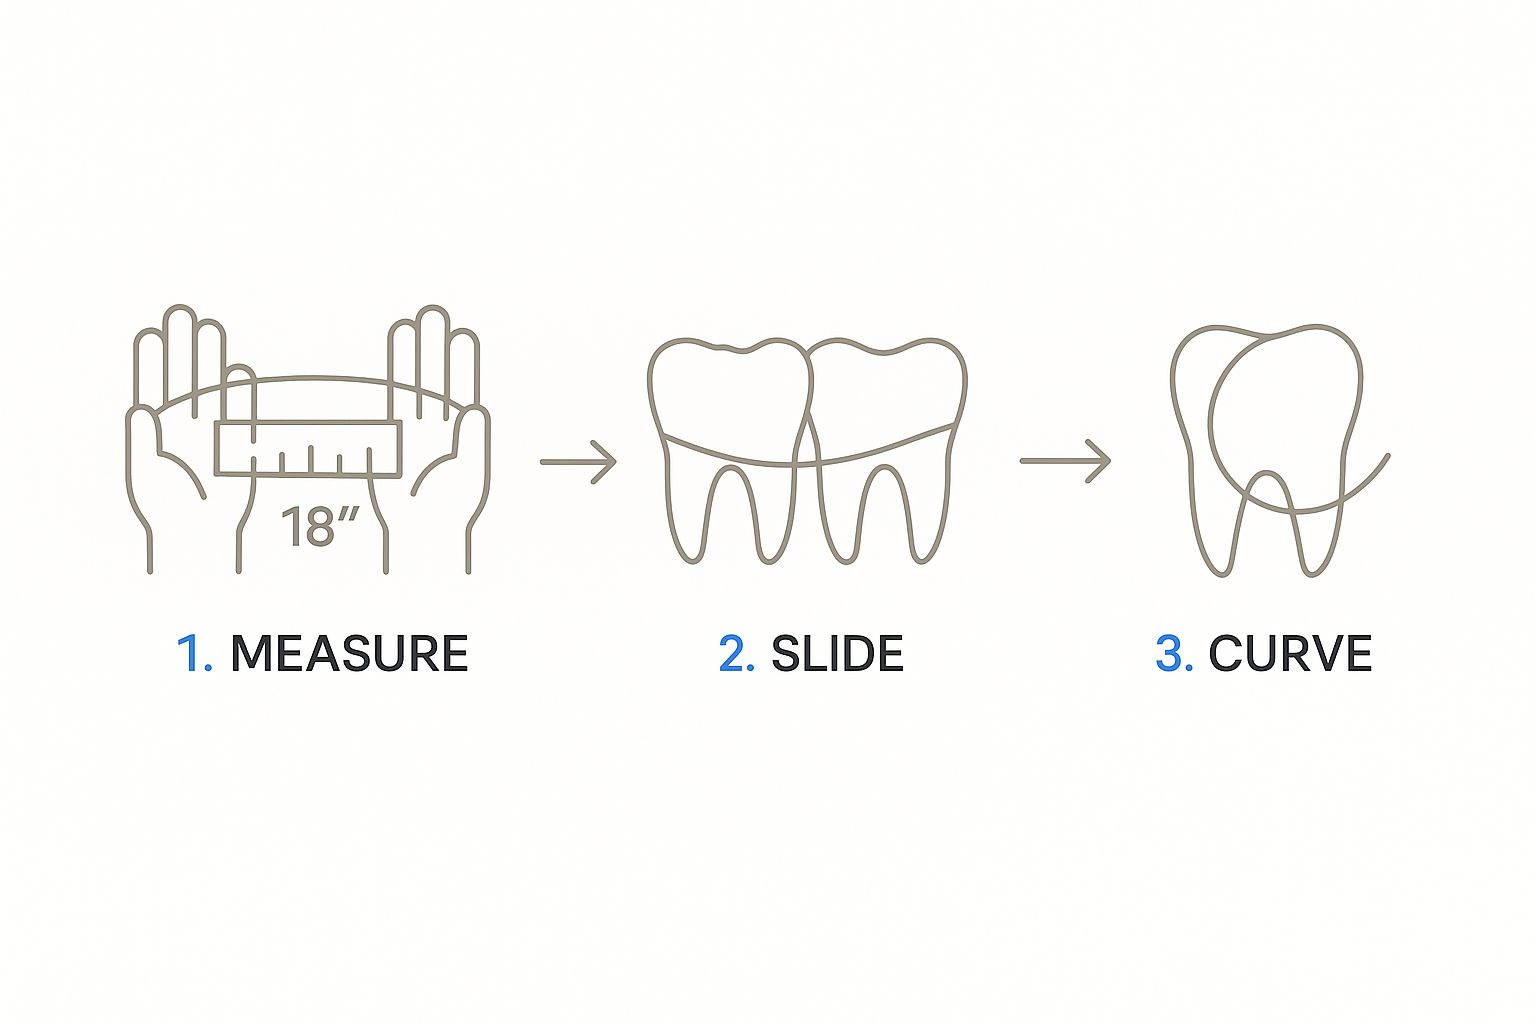
First up, pull out a generous length of floss—about 45 centimetres is the sweet spot. We know it sounds like a lot, but this gives you a fresh, clean section for each tooth, which is crucial for preventing the transfer of plaque from one part of your mouth to another.
Wrap most of the floss loosely around one of your middle fingers, and just a small amount around the middle finger of your other hand. This leaves your thumbs and index fingers free to do the actual work. You’ll use them to grip a small, tight section of about 2-3 centimetres. This short length gives you the control you need to guide the floss precisely without it slipping.
The image below shows you exactly what this looks like.
Seeing the right amount of floss and the correct hand position makes it much easier to get a feel for it when you start.
The C-Shape Secret
This next part is the absolute key to effective flossing. Once you’ve got your grip, gently guide the floss between two teeth using a soft, back-and-forth sawing motion. Whatever you do, never snap it down onto your gums. That’s a surefire way to bruise or cut the delicate tissue.
When the floss reaches your gumline, stop and do this:
Curve the floss into a “C” shape, wrapping it around the side of one tooth. Gently slide it down into the space between the tooth and gum until you feel a bit of resistance. This little pocket is where the most harmful plaque loves to hide.
Now, move the floss up and down against the side of that tooth a few times. Then, without pulling it out of the gap, simply curve it into a “C” around the neighbouring tooth and do the same thing. Unwind a fresh section of floss from your finger, and you’re ready for the next space.
That C-shape movement is what makes all the difference. It ensures you’re cleaning the entire side of each tooth, right down below the gumline, not just the bit where they touch.
If you’ve heard some conflicting advice or are curious about what’s true and what’s not, we’ve busted some of the most common myths about flossing in this article. It’s this attention to detail that really pays off for your oral health.
Common Flossing Mistakes to Avoid

Learning the proper flossing technique is a huge step forward, but it’s just as crucial to unlearn a few common bad habits. Even with the best intentions, it’s all too easy to do things that are either ineffective or, even worse, harmful to your gums.
At our Wellington clinic, we tend to see the same slip-ups time and again. The good news? They are simple to fix with a little awareness. Let’s walk through some of the most frequent flossing mistakes so you can feel confident in your routine.
Forcing the Floss Down
One of the most common errors we see is ‘snapping’ the floss straight down into the gum. This can be jarring and painful, often leaving your gums bleeding or feeling bruised. Over time, it can even damage the delicate tissue that connects your gums to your teeth.
Instead, think about gently guiding the floss between your teeth. Use a soft, back-and-forth sawing motion. This approach gives you complete control and ensures you enter the space without causing any trauma.
Missing the Most Important Area
Another frequent mistake is only cleaning the tight spot where the teeth touch. While that’s better than nothing, the most critical area to clean is actually just below the gumline. This tiny pocket is where nasty plaque builds up, leading to inflammation and gingivitis.
Remember the C-shape we talked about earlier? This is exactly why it’s so vital. By curving the floss around the tooth and carefully sliding it beneath the gum, you’re cleaning out the one place your toothbrush simply can’t reach. This small change makes all the difference.
The final common mistake is using the same little section of floss for your whole mouth. This can just end up moving plaque and bacteria from one gap to another. Always make sure to unwind a fresh, clean section of floss for each tooth to guarantee a truly effective clean.
If you’re curious to learn more about how flossing fits into your overall routine, check out our article exploring if flossing is as important as brushing.
Flossing Tips For Every Age And Situation
Your dental needs aren’t static; they change throughout your life. It only makes sense that your flossing routine should adapt right along with them. What works perfectly for a young adult with straight teeth won’t be the right approach for someone with a crown, a bridge, an implant or even just tightly packed teeth.
At City Dentists, we provide expert care for every stage of life, and our advice is always tailored to your specific situation.
Navigating Different Dental Needs
Getting kids on board with flossing, for instance, is a classic challenge. We find that floss picks are a game-changer here. They’re much easier for small hands to grip and manoeuvre, and they can even make the whole process feel a bit more like a game.
For adults, the challenges look different. Many people struggle with tightly crowded teeth, where forcing floss through can be a real battle. In this case, a waxed dental tape often provides a much smoother, less frustrating glide between the teeth.
And what about dental work? If you have a bridge or crowns, a standard flossing approach just won’t cut it. A floss threader is an absolute must-have. Think of it as a little needle that helps you guide the floss underneath your bridge, letting you clean those hard-to-reach surfaces and the gumline that would otherwise be missed.
No matter your age or what’s going on in your mouth, the goal is always the same: gently clean the sides of each tooth and just below the gumline. Consistency is everything.
As we get older, keeping up with our oral health becomes even more critical. By 2018, there were over 715,200 New Zealanders aged 65 and older, and the great news is that most are keeping some or all of their natural teeth. This makes effective cleaning absolutely essential to prevent issues like gum disease.
While most older adults are great at brushing daily, flossing is often the step that gets skipped. It’s a vital part of removing plaque and keeping your gums healthy. You can read more about these oral health findings in older adults to see just how important this is.
Making flossing a non-negotiable part of your daily routine is one of the best investments you can make for your long-term smile. If you need a little more help, our guide on how to make flossing part of your daily regime has plenty more practical tips.
Your Flossing Questions Answered by Our Dentists
It’s completely normal to have questions when you’re trying to perfect a new habit. At our Wellington clinic, we hear them all the time, and we believe there’s no such thing as a silly question when it comes to your oral health. Let’s tackle some of the most common queries we get about flossing.
Is It Normal for My Gums to Bleed When I Start?
Yes, a little bit of bleeding when you first start a consistent flossing routine is actually quite common and nothing to be alarmed about. It’s usually a sign that your gums are inflamed due to plaque buildup—the very thing you’re now working to remove!
Think of it like exercising a muscle you haven’t used in a while; it might feel a bit tender at first. As you continue to floss correctly and gently each day, the inflammation will reduce, and the bleeding should stop within a week or two. If it persists, that’s a sign to come and see us for a check-up.
Don’t let a little pink in the sink discourage you. It’s your body’s way of telling you that you’re cleaning an area that really needed the attention. Keep up the great work!
When Is the Best Time to Floss?
The most honest answer? The best time to floss is whenever you’ll actually do it! Whether it’s in the morning to start fresh or at night before bed, consistency is what matters most.
That said, if you’re looking for the ideal time, many dental professionals recommend flossing just before you brush your teeth. This clears out the food and plaque from between your teeth first, allowing the fluoride in your toothpaste to reach more of your tooth’s surface.
What if I Have Sensitive Gums?
If you have sensitive gums, the key is to be extra gentle. Avoid snapping the floss down; instead, use that careful back-and-forth sawing motion to ease it between your teeth. Making sure you use the ‘C-shape’ technique will also prevent you from applying too much pressure directly onto the gum tissue.
For those with sensitivity, a waxed floss or a smooth dental tape can often feel much more comfortable. These are designed to glide smoothly, reducing irritation while still providing an excellent clean. Understanding how to manage this is a key part of our guide to long-term gum disease prevention, which is always our ultimate goal for our patients.
Your smile is unique, and your dental care should be too. If you have more questions or want a personalised assessment of your oral health, the friendly, expert team at City Dentists is here to help you feel confident and in control. Book your appointment with our caring dentists online or give our central Wellington clinic a call today. https://www.citydentists.co.nz